

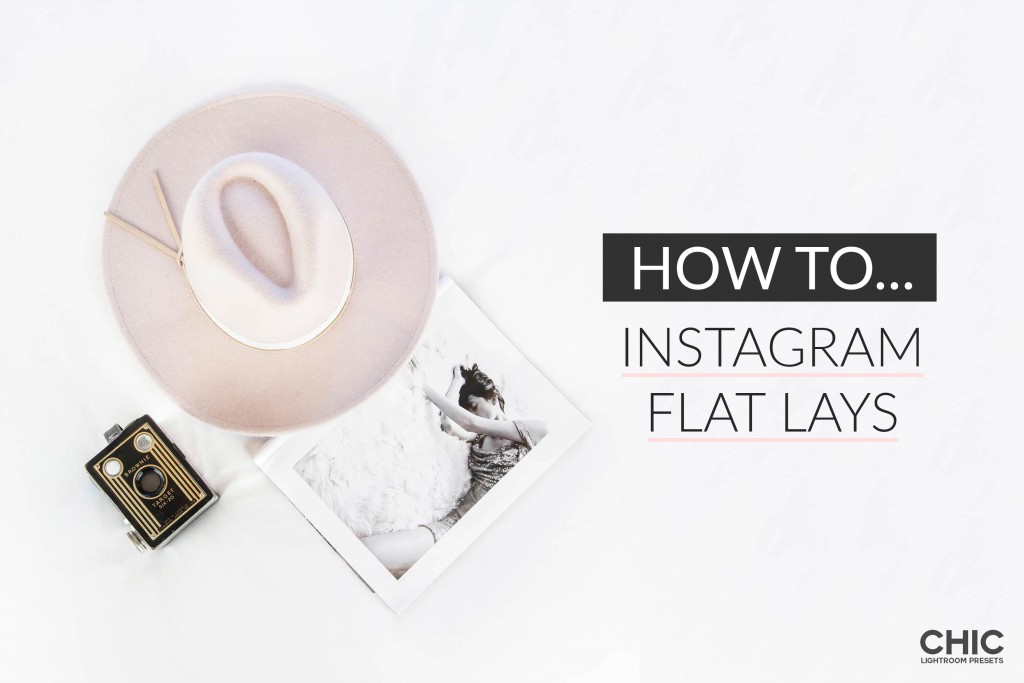
How to Photograph Instagram Flat Lays: Are you a photographer or a blogger who wants to start an Instagram account? Or, do you already have an account and you’re looking to generate more interest in your brand? Well, look no further! Flat lays are a great way to mix up your content and get your followers interacting with you! Today, I’ll be sharing a few tips and tricks that I’ve learned along the way and breaking down what I do to create my own Instagram flat lays. Oh yeah, and don’t forget to download my FREE Lightroom Preset: “Flat Lay” for easy editing, which you’ll find at the bottom of the page! Let’s get started…


Background – Choosing the right background for your flat lay will depend on where you want your followers’ eyes to land when they initially look at your photo. A White background allows your followers to focus their attention on the objects that you’re photographing without interruption (more about this below). A Colorful background attracts your eye to the photo as a whole rather than focusing on each individual object. A Textured background tells a story about where the photo was taken and can easily convey a mood or a feeling. All three are effective in their own way. Think about how you want your followers to interact with your photos and choose accordingly.


Composition – Think about how you compose your photos. Do you prefer a structured look, with a straight composition? Or, do you prefer to photograph your flat lays on an angle? Or, a mix of both? If I’m not sure what looks best, I arrange the items multiple ways and take multiple shots using a different composition each time. Eventually, I find the best composition for the photo.


Negative Space – Just like with other forms of art, negative space plays a big role in photography. Negative space refers to the empty space that surrounds an object. Negative space is soothing to the eye and provides a place for the eye to rest. Above I’ve provided a snapshot of my Instagram account. I’ve circled the flat lays that feature negative space. As you can see, when arranged in a grid, negative space evens out the gallery and gives followers a place to rest their eyes between the larger travel shots. As we discussed earlier, negative space will also bring your attention to the objects in the photo rather than requiring your eye dart around the image multiple times to understand the message you’re trying to convey. Reminder: Sometimes a lack of negative space can also be effective, but only if it’s executed well and with purpose. Picture a busy mural or a well laid out flat lay with more than 10 items.


Editing in Lightroom – Editing your flat lay photos in Lightroom is a great way to control multiple elements of your image. Editing a flat lay involves adjusting the Exposure, Highlights, Shadows, Whites, Blacks, Sharpening and Noise Reduction until you create the perfectly balanced photo. I personally love to boost the White in my flat lays until I get that professional studio look. I’ve created a Free Lightroom Presets called “Flat Lay” that I use for my own Instagram photos. It’s the perfect mix of all the elements that I shared above. Download it here for FREE! Looking for more Chic Lightroom Presets? Check out The Complete Collection.

Well, I hope that this tutorial was helpful and that you take advantage of some of these tips and tricks that I use on a daily basis. Remember, with the right information and a little creativity, you can do this! Have fun making your beautiful flat lays! Cheers.


Check out my best sellers!


Lightroom Presets

Lightroom Presets
Lightroom Presets

Lightroom Presets

Lightroom Presets

Lightroom Presets

Lightroom Presets
Lightroom Presets

Lightroom Mobile DNG

Lightroom Mobile DNG